Compost for raised bed garden fills behaves nothing like the compost you rake into in-ground soil. A framed bed is a large container, not a patch of earth. Water drains faster, nutrients leach quicker, and salts concentrate where roots cannot escape them. That single physical distinction drives every decision below.
It changes how much compost to use, what to blend it with, and exactly how deep to build. It also changes how to tell finished compost from the immature batch that will bleach your seedlings the week you transplant. The recipe you pick either feeds a bed for years or sabotages it by June.
Most beginner guides stop at a vague instruction to add organic matter. The massive gap they leave is quality and quantity. They fail to explain how to judge a pile before you buy it, and how to compute the cubic yards your specific bed needs. This guide closes both gaps with sourced facts.
It uses specific application rates from Oregon State University Extension, the University of Maryland Extension, and Penn State Extension. It also includes the exact contaminant thresholds that a food-growing bed lives or dies by.
Quick answer: For most established raised beds, blend 20 to 30 percent mature compost by volume with topsoil or a soilless mix. Go up to 50 percent only when filling a brand-new bed. Never fill a bed with compost alone. Extension recommendations cluster closely between 20 and 50 percent.
The safest long-term default is 25 to 30 percent. Confirm the compost is fully finished, meaning it is dark, crumbly, and has an earthy smell. Keep the final blend soluble salts strictly under 4 mmhos per centimeter to protect delicate transplants from chemical burn.
Why Compost Behaves Differently in a Raised Bed
A raised bed is a contained growing medium that acts like an oversized pot. The compost inside it drains, dries, and loses nutrients faster than the same compost worked into open ground soil. Oregon State University Extension is blunt about the consequence of this physical setup.
Do not fill framed beds with compost alone. Compost lacks the vital mineral component that earthen soil and planting mixes supply. Roots in a container-style bed cannot reach down to a natural water table or a mineral-rich subsoil.
Because of this isolation, the soil blend has to carry structure, drainage, and a slow nutrient supply all at once. That containment is also why salt and immaturity problems hit much harder here. In open ground, heavy rain flushes excess salts sideways and down into the subsoil.
In a bed built on a hard patio surface, there is nowhere for those salts to go. They accumulate around the root zone, stunting early growth and locking out moisture. The bright upside to this containment is total control. You build the exact soil profile you want from the start.
This is why the USDA Natural Resources Conservation Service soil-health principles are easier to apply in a bed than in a compacted yard. Those principles include minimizing disturbance, maximizing soil cover, maximizing living roots, and maximizing biodiversity. Compost is the primary lever that delivers three of those four simultaneously.
Good compost habits pair well with the same no-dig thinking behind a solid compost bin for chicken manure setup. In both cases, the quality and maturity of the starting feedstock absolutely decide the final outcome for your crops.
The Right Compost-to-Soil Ratio (and the Real Disagreement)
The correct compost ratio for a raised bed sits somewhere between 20 and 50 percent by volume. The honest answer is that reputable authorities disagree inside that band. There is no single magic number, and any guide claiming one is simply guessing based on anecdote.
What matters most is matching the ratio to the specific age and condition of the bed. A brand-new bed can carry more compost because it needs bulk organic matter fast. An established bed getting an annual top-off needs far less. Here is where the named university sources actually land.
- Penn State Extension: Recommends 70 percent soil to 30 percent compost.
- Oregon State University Extension: Add up to 25 percent compost by volume when filling framed beds.
- University of Maryland Extension: Use compost plus a soilless mix at a 1:1 ratio. Limit topsoil to 20 percent by volume for beds at least 16 inches deep.
- Michigan State University Extension: Suggests a topsoil to compost ratio of 2:1, which is about 33 percent compost.
- University of Minnesota Extension: Recommends roughly one-half to two-thirds topsoil mixed with one-third to one-half plant-based compost.
- SDSU Extension: Cites a 10 to 50 percent range, noting that about 25 percent is the most common approach.
Read across those recommendations and a clear, safe default emerges. Plan for 25 to 30 percent compost for an ongoing bed. Push toward 50 percent only when filling a new bed from scratch, then dial back the application rate as the bed matures and naturally settles.
Where Mel’s Mix Fits
The named recipe most people search for is Mel’s Mix, originating from Mel Bartholomew’s Square Foot Gardening. First published in 1981 and revised in 2005, it calls for one-third compost, one-third peat or coir, and one-third coarse vermiculite by volume.
That equals roughly 33 percent compost, but it is a distinct container-style blend, not a standard extension soil recommendation. It shines in shallow, intensively planted grids and leans on frequent liquid feeding. It is not the same thing as a heavy topsoil-based fill.
Mel’s Mix is highly porous and exceptionally lightweight, which makes it excellent for rapid root development. However, it is poor at retaining long-term fertility without continuous intervention. If you use it, expect to replenish the compost fraction every single season as it oxidizes and vanishes.
What to Blend Compost With, and Why Never 100 Percent
Compost is a powerful soil amendment, not a standalone soil. It needs a mineral and structural partner to become a viable growing medium. Pure compost slumps rapidly, holds too much water at first, and then dries to an impenetrable, cracked crust.
Pure compost also frequently carries salt levels that can easily stall seed germination. The permanent fix is blending compost with materials that add mineral body and permanent pore space. Oregon State University Extension and the University of Maryland Extension explicitly warn against using only compost.
They frame the fill as compost plus soil or a soilless mix, never pure compost by itself. This is precisely because compost has no sand, silt, or clay to give the bed lasting physical structure. The usual blend partners each perform a specific, irreplaceable job.
- Topsoil or native mineral soil: This supplies the heavy sand, silt, and clay that hold physical structure and buffer nutrients over multiple years.
- Coir or peat moss: These add aggressive water retention and lightness. They form the primary backbone of Mel’s Mix and other soilless media.
- Coarse vermiculite or perlite: These completely open up pore space, improving root aeration. Vermiculite holds both water and dissolved nutrients, while perlite simply drains.
- Coarse builder sand: This dramatically improves drainage in heavy, clay-rich topsoil blends. It must be used sparingly to avoid creating a concrete-like texture.
You should also blend multiple compost sources together. A mix of yard-waste, food-scrap, manure, mushroom, and worm-casting composts spreads out the risk. It ensures that if one single batch is slightly immature or salty, the others dilute the problem.
Blending diverse composts also broadens the microbial population and nutrient profile of the finished bed. Relying entirely on a single source, like pure steer manure compost, invites severe nutrient imbalances that take multiple seasons to correct.
The Layering Method vs. The Mixing Method
Gardeners often debate whether to mix compost evenly throughout the bed profile or layer it thickly on top. Both approaches work, but they serve completely different goals. The mixing method, where you blend the topsoil, sand, and compost together before planting, gives immediate uniformity.
Mixing ensures that delicate roots find a consistent texture and moisture gradient all the way down to the bottom. This is absolutely critical for deep-rooted crops like carrots and parsnips, which will fork or twist if they hit sudden changes in soil density.
The layering method, popularized by widespread no-dig advocates, involves placing a thick layer of raw topsoil at the bottom and capping it with pure compost on top. Over time, earthworms and heavy rain pull the compost down into the mineral layers.
Layering is significantly less labor-intensive initially and creates a fantastic, weed-suppressing seedbed on the direct surface. However, in a brand-new, deep raised bed, thick unmixed layers can sometimes impede water drainage, causing a perched water table right where the layers meet.
For the best results in a new framed bed, use a hybrid approach. Then, apply a one-inch layer of pure, finely sifted compost directly to the top surface as a mulch.
Bed Depth Drives How Much Compost You Buy
Depth is the hidden mathematical multiplier in every compost order. Volume scales directly and aggressively with exactly how deep you build your frames. The University of Maryland Extension ties depth directly to the crop type you intend to grow.
For beds placed on hard surfaces like concrete, allow at least 8 inches of depth for leafy greens, bush beans, and cucumbers. You will need 12 to 24 inches for demanding, deep-rooted crops like peppers, tomatoes, and winter squash.
Shallow-rooted leafy crops tolerate a much thinner soil profile. Fruiting crops absolutely need the deeper root run to support the physical size of the plant and to fuel its heavy summer harvest. Get the depth right first, because the ratio and volume math follow entirely from it.
A bed sitting on open soil behaves differently from one on concrete or a patio. On open soil, roots can grow completely past the wooden frame into the native ground below. This means a shallower fill still works for many large crops.
On a hard surface, the wooden frame represents the entire available root zone. This physical limitation is why the Maryland depth minimums are written specifically for that restricted case. Depth also decides how top-heavy the organic fraction of the bed becomes.
Deeper beds settle significantly more in their first active season as the large volume of organic matter decomposes. This inevitable settling loops directly into the total volume you should order initially, and the maintenance top-off you must plan for later.
Volume Math: How Much Compost for Your Bed
Compute total compost volume with one highly reliable formula. Cubic feet equals length in feet times width in feet times depth in feet. Then, divide that cubic foot number by 27 to get cubic yards. This single calculation is what beginner guides frequently skip.
It is the difference between scheduling one accurate bulk delivery and making three panicked, expensive trips to the garden center. Oregon State University Extension gives a worked anchor example to verify your math.
It takes exactly 1.7 cubic yards of soil mix to fill four beds measuring 3 feet wide by 8 feet long at a 6-inch depth. Multiply your desired compost percentage by the total fill volume to isolate the compost portion of the final order.
Let us work a single 4 by 8 foot bed filled exactly 12 inches deep. That is 4 times 8 times 1, which equals 32 cubic feet. Divided by 27, that equals roughly 1.19 cubic yards of total fill required.
If you aim for a 25 percent compost ratio, the compost share is about 0.30 cubic yards. The remaining 0.89 cubic yards will be your heavy topsoil, coarse sand, or soilless mix base.
A Quick Bed-Size Reference Table
Use this cheat sheet to estimate total fill volume quickly. Once you have the total volume, simply split it by your chosen compost ratio to find your exact buying target.
- 4 ft x 4 ft, 6 in deep: Requires 8 cubic feet, or about 0.30 cubic yards of total fill.
- 4 ft x 8 ft, 6 in deep: Requires 16 cubic feet, or about 0.59 cubic yards of total fill.
- 4 ft x 8 ft, 12 in deep: Requires 32 cubic feet, or about 1.19 cubic yards of total fill.
- 3 ft x 6 ft, 10 in deep: Requires 15 cubic feet, or about 0.55 cubic yards of total fill.
- Four 3 ft x 8 ft beds, 6 in deep: Requires 1.7 cubic yards total, directly matching the OSU reference figure.
Bagged vs Bulk: The Break-Even Point
Bagged compost is highly convenient for one small bed, but it is expensive by volume and heavy to haul by car. Bulk delivery easily wins on price the moment you cross roughly one single cubic yard of required material.
This is why one real gardener report of needing 3 cubic yards for 6 beds points straight to bulk ordering. If your math lands above one cubic yard, you must price out a bulk load from a local soil yard.
The exact same yard-versus-bag logic that governs a cubic yard of mulch and what it really covers applies equally to compost. Both products are sold and delivered by the exact same volume units, and bulk delivery fees flatten out the total cost at scale.
Judging Compost Quality Before You Use It
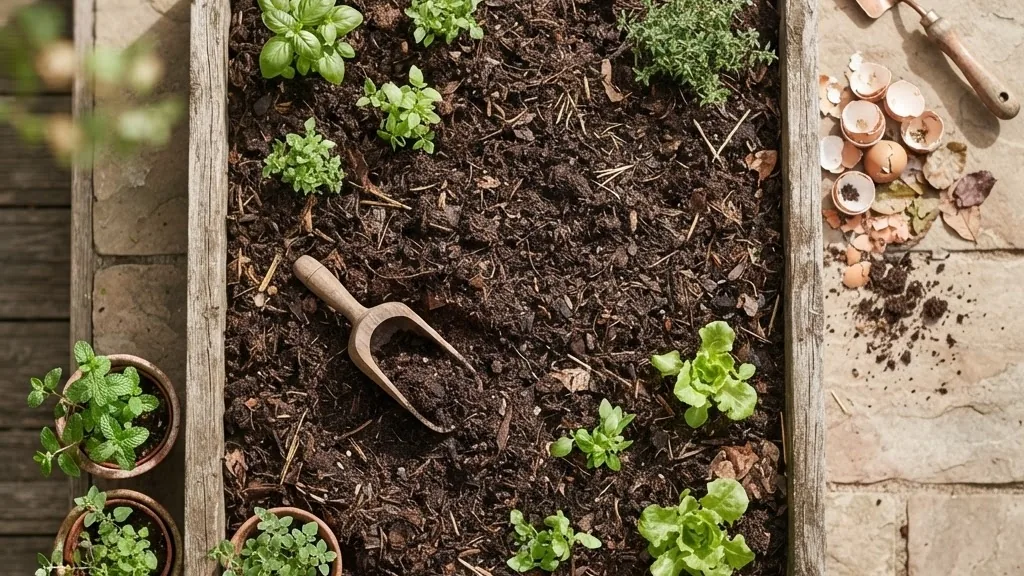
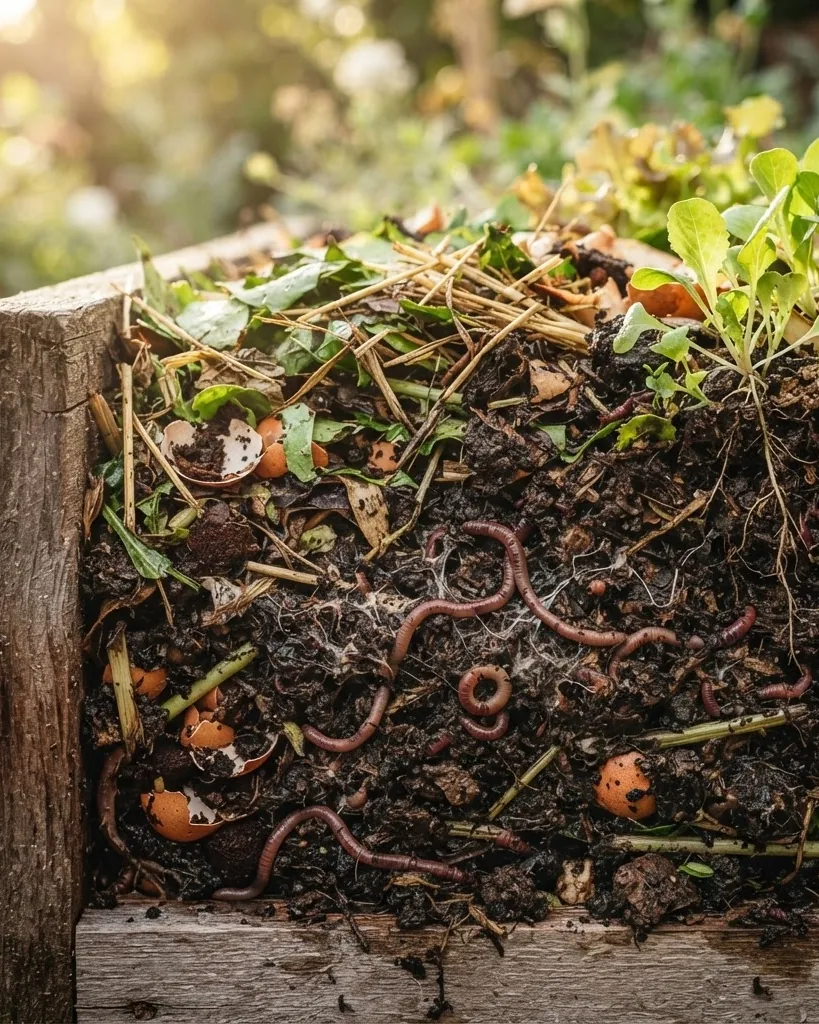
Finished compost is dark, crumbly, smells pleasantly earthy, and shows absolutely no recognizable feedstock. Immature compost smells strongly of ammonia, sulfur, or sour garbage, and it can chemically injure young plants within days. This physical maturity check is the single most important step, and it comes before any of the soil-building advice in Penn State Extension’s guide to building garden soil.
It is also the vital step most gardening guides omit entirely. Washington State University Extension warns that immature, anaerobic compost forms highly phytotoxic organic acids. In composts with a carbon-to-nitrogen ratio above 40:1, acetic acid often dominates the chemical profile.
This acid causes near-immediate bleaching, sudden wilting, and severe tissue injury to sensitive young roots. The first defense is remarkably simple: use only mature compost. Your nose is a highly accurate, real-world diagnostic tool here, not just a folk remedy.
If the pile smells exactly like a forest floor after heavy rain, it is ready. If it smells like a landfill or a wet barn, walk away immediately. Beyond the basic smell test, two specific laboratory numbers matter immensely for a raised bed blend.
- Carbon-to-nitrogen ratio: The compost used in soil mixes should strictly run about 15:1 to 18:1. Above roughly 20:1, expect severe nitrogen robbing. This is where microbes tie up the available nitrogen your plants desperately needed to grow, according to MOFGA and UF/IFAS.
- Soluble salts (EC): Raw compost typically runs 1 to 10 mmhos per centimeter. The final soil blend should stay strictly under 4 mmhos per centimeter. Sensitive greenhouse mixes must stay below 1 mmho per centimeter, per UMass Amherst and MOFGA.
Seedlings and young transplants are in their absolute most salt-sensitive life stage. Germination is best at an EC at or strictly below 4 dS per meter, per a detailed 2020 peer-reviewed review.
Oregon State University Extension publishes excellent, thorough guidance on reading commercial compost analyses if you want to take the lab route. The US Composting Council Seal of Testing Assurance program explicitly rates maturity for products that carry its label.
When in doubt, always request the test data sheet from the yard before signing for a massive bulk order. Good facilities test their active piles quarterly and will hand you the printout gladly.
Contaminants: Lead and Herbicide Carryover
Two completely invisible contaminants can quietly ruin a food-growing bed. These are heavy lead in the native soil and long-lived chemical herbicides that ride in on manure or hay-based compost. This is the critical safety section that experience-only guides simply skip.
It is where a food bed earns real, verifiable safety trust. The University of Maryland Extension sets a very clear, inflexible line for human safety. Do not grow vegetables in any soil with a total lead level over 400 parts per million.
For context, typical background lead naturally runs between 10 and 50 parts per million. A basic soil test before you plant is extremely cheap relative to a season of contaminated, dangerous harvests. It is the only way to know which side of that 400 ppm line your soil sits on. The EPA guidance on lead in soil explains how the metal behaves once it is in the ground, and why keeping pH near neutral limits what plants take up.
The second major threat is agricultural herbicide carryover. Chemicals like picloram, clopyralid, and aminopyralid can stay highly active in hay, grass clippings, manure piles, and finished compost for an unusually long time. This is confirmed directly by North Carolina State University Extension.
These killer-compost residues survive the intense heat of the commercial composting process. They can distort, stunt, or outright kill tomatoes, beans, peas, and other sensitive broadleaf crops even at microscopic trace levels. You must still protect the bed with a few basic screening habits.
- Source manure and hay composts carefully. Ask the supplier explicitly whether the source pasture or hayfield was treated with long-lasting broadleaf herbicides.
- Run a simple bioassay. Plant a few fast-growing beans or peas in a small pot filled with a sample of the compost. Twisted, cupped, or stringy new growth absolutely signals dangerous chemical carryover.
- Test native soil for lead. Always test before growing vegetables, especially if the bed is placed near old painted structures or busy roadsides where lead paint or fuel was widely used.
These rigid safety checks matter most for edible crops. For an ornamental border of the best native trees and shrubs for a backyard garden, the tolerance is much wider. A vegetable food bed leaves absolutely no margin for chemical error.
pH, Seasonal Settling, and the Annual Top-Off
Target a soil pH of 6.0 to 7.0 for the vast majority of common vegetables. Expect the bed to sink several inches in its first active season as the organic matter decomposes, oxidizes, and settles physically. Both of these unavoidable facts shape your ongoing care.
Most vegetables take up dissolved nutrients best in that specific 6.0 to 7.0 window, per Almanac and general extension consensus. Meanwhile, perennial crops like strawberries prefer a slightly more acidic range of 5.5 to 6.5, according to Ask Extension.
A simple, cheap pH test each spring tells you immediately whether you need to adjust the soil with lime or sulfur. The raised-bed format makes correction much easier because you control the entire restricted soil profile, unlike an open, sprawling yard.
Physical settling is completely normal and not a failure of your mix. As the compost fraction breaks down and feeds the soil food web, the physical level naturally drops. This constant consumption of organic bulk is exactly why an annual top-off routine exists.
Each spring, add a fresh one to two-inch layer of mature compost directly to the soil surface, rather than digging the bed over entirely. This gentle no-dig top-dressing continuously feeds the biology, restores lost volume, and keeps soil cover totally intact.
This matches the NRCS principle of minimizing mechanical disturbance. Planting a cover crop through the cold off-season adds living roots and powerfully protects the surface from severe winter erosion.
The same steady seasonal rhythm that keeps a vegetable bed highly productive also keeps ornamental plantings perfectly healthy. This is true whether you are timing a simple spring top-off or learning exactly how to prune hydrangea without cutting off next year’s flowers.
Homemade vs Bought, and Types of Compost
Homemade compost is completely free and lets you control every piece of feedstock that goes in. Bought compost delivers massive volume fast and, if it is certified, comes with reliable maturity data. Most serious raised-bed gardeners eventually use a combination of both.
The specific type matters just as much as the source, because each compost carries a totally different nutrient and salt profile. This profile dramatically changes how the compost behaves in a contained, fast-draining raised bed environment.
Blending several distinct types is the most practical hedge that no single-source pile can ever match. It spreads out the risk that one batch is immature, too salty, or carrying trace herbicide residue. The common types each bring a distinct character to the bed.
- Yard-waste compost: Made from leaves and twigs. It is leafy, well-balanced, widely available, and usually very moderate in salts. It is excellent for bulk fill.
- Food-scrap compost: Very nutrient-rich but can run much higher in soluble salts. You should blend it down with milder yard waste.
- Manure compost: Extremely nitrogen-strong, but carries the absolute highest herbicide carryover risk. Always verify the farm source before buying.
- Mushroom compost: This is spent fungal substrate. It is often quite salty when fresh, so it is best aged outdoors and blended carefully.
- Worm castings (vermicompost): A highly concentrated biological booster. It is very expensive, so it is used in tiny proportions, not as bulk fill.
Whichever type you choose to import, the strict maturity and salt checks detailed above still apply perfectly. A mathematically rich compost that fails the basic smell test or the EC threshold is simply not ready for plants, no matter how well it was originally made.
Troubleshooting Common Compost Problems in Raised Beds
Even with highly careful blending, raised beds occasionally run into severe problems directly tied to the compost fraction. The most frequent issue in midsummer is hydrophobicity, where the soil surface actively repels water. This happens when the peat or immature compost dries out completely.
Water simply beads up and runs down the wooden sides of the frame, leaving the root zone totally bone dry. To fix this, apply water in short, five-minute bursts to slowly break the surface tension, or gently scratch a drop of mild dish soap into the top layer to act as a wetting agent.
Another frequent issue is a sudden, massive explosion of weed seeds.
However, cold homemade compost or poorly managed municipal piles often totally fail to reach this critical temperature threshold. If your new bed sprouts hundreds of tiny weed seedlings, the compost was the definite source. The best defense is to lay down a thick organic mulch immediately after planting.
Fungus gnats are a third common complaint, particularly in heavily composted beds that stay continuously wet. These tiny black flies heavily thrive on the rapidly decaying organic matter and rich fungi present in premium compost.
While the adults are mostly a visual nuisance, severe larval infestations can damage fine seedling roots. Let the top two inches of the bed dry out completely between waterings to break their breeding cycle, and ensure your compost ratio is not so excessively high that it prevents proper drainage.
Frequently Asked Questions
How much compost should I mix into a raised bed?
For most established beds, mix 20 to 30 percent mature compost by volume with heavy topsoil or a soilless blend. Extension sources range from Oregon State University recommending up to 25 percent, to Penn State securely suggesting 30 percent.
When filling a brand-new bed, you can temporarily go up to 50 percent to quickly establish organic matter, then dial back over time. Never fill a bed with compost alone, as it completely lacks lasting mineral structure.
Can I fill a raised bed with only compost?
No, this is a very common and highly expensive mistake. Oregon State University Extension explicitly warns that compost lacks the vital mineral component of real soil. A pure-compost bed slumps quickly, drains very poorly after drying out, and often carries high salt levels.
These concentrated salts can easily stall seed germination. You must blend compost with topsoil, coir, coarse sand, or vermiculite so the bed has permanent, lasting physical structure. Compost is a powerful amendment, not a complete growing medium on its own.
How do I know if compost is finished and safe?
Finished compost is dark, crumbly, smells pleasantly earthy, and shows absolutely no recognizable feedstock like raw leaves or vegetable rinds. Reject any batch smelling of harsh ammonia, raw sulfur, or sourness.
Washington State University Extension heavily links immature compost directly to phytotoxic organic acids that can severely injure plants. For a strict lab check, aim for a carbon-to-nitrogen ratio near 15:1 to 18:1, and keep soluble salts under 4 mmhos per centimeter in the final blend.
How many cubic yards of compost do I need?
Calculate total cubic feet as length times width times depth in feet. Then, divide that number by 27 to get total cubic yards, and finally multiply by your desired compost percentage. Oregon State University Extension directly notes a useful example.
They state that four 3-by-8-foot beds at 6 inches deep take exactly 1.7 cubic yards of total mix. You should switch to a bulk order once your total required fill crosses about one cubic yard, heavily saving on bagged costs.
Should I worry about lead or herbicides in bought compost?
Yes, especially on a food-producing bed. The University of Maryland Extension firmly states not to grow vegetables where total lead heavily exceeds 400 parts per million, versus a normal 10 to 50 ppm background level.
North Carolina State University Extension firmly warns that chemicals like clopyralid, aminopyralid, and picloram can highly survive composting in manure or hay. Test native soil for lead, and run a bean bioassay on suspect compost before planting edibles.
How often do I top off compost in a raised bed?
You should top off exactly once a year, usually in early spring. Add a fresh one-to-two-inch layer of mature compost directly to the surface to tightly replace what naturally settled and decomposed over the active growing season.
Top-dress rather than dig deeply, which heavily preserves delicate soil biology and keeps the surface covered. Leaving a cover crop intact through the long off-season actively adds living roots and completely protects the bed structure until you are ready to plant again.