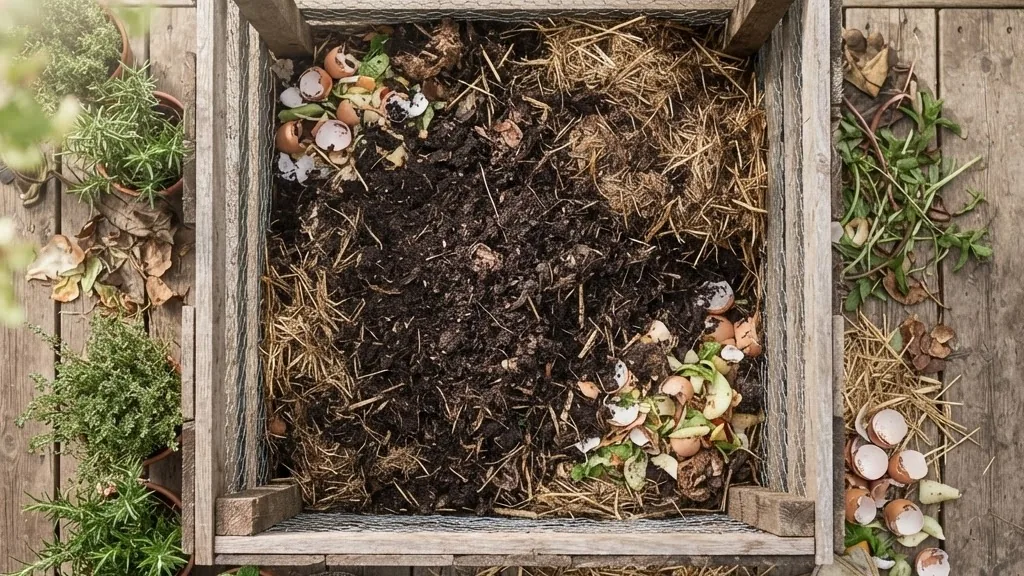
A compost bin for chicken manure is the single best thing you can build for a vegetable garden, because it turns a problem into a treasure. Fresh chicken droppings are too strong to use straight. They are loaded with nitrogen and ammonia that will scorch roots, and they can carry harmful germs. Composted properly, that same manure becomes dark, crumbly black gold that feeds your soil for a whole season. The trick is doing it right, and that is exactly what this guide covers.
I keep a small flock, and the manure adds up fast. Over the years I have settled on a simple, reliable system that any backyard gardener can copy. You will learn why raw manure is risky, how to size and build your bin, the brown-to-green recipe that makes a pile heat up, the temperatures that keep it safe, and how long to wait before it touches your tomatoes.
The short answer
Here is the whole process in brief.
- Never use raw chicken manure on plants. It is too hot and can carry pathogens.
- Build at least a 1 cubic yard bin, ideally a 2-bin system so one batch heats while another cures.
- Mix manure with carbon like straw or leaves, aiming for roughly a 30 to 1 carbon-to-nitrogen balance.
- Heat the pile to 130 to 160 F for several days to kill germs and weed seeds.
- Cure it for 45 to 60 days, and age the manure 3 to 6 months in total before using it on food crops.
Do those five things and you turn a smelly chore into the best free fertilizer your garden will ever get.
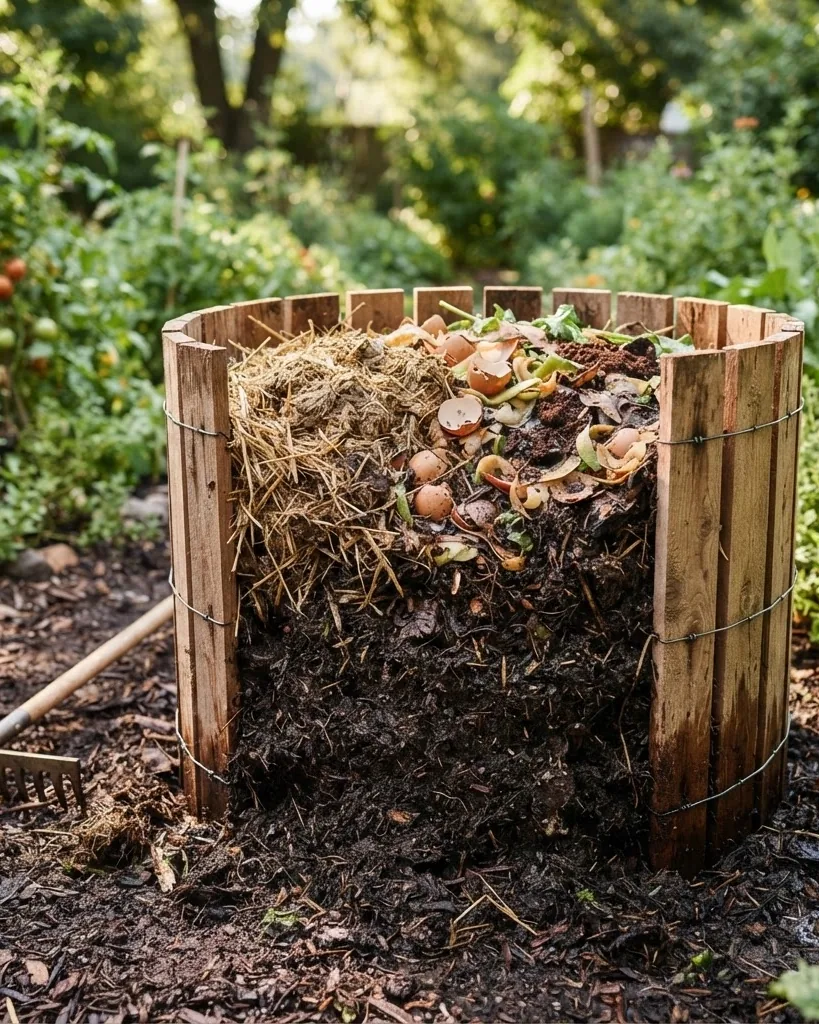
Why you must compost chicken manure first
Chicken manure is prized precisely because it is rich, but that richness is also the danger. Two problems make raw manure a bad idea straight from the coop.
It is too strong. Fresh droppings carry a lot of nitrogen and ammonia. Spread them on a bed and they can burn plant roots and foliage, the opposite of what you want. Gardeners call manure in this state “hot,” and it needs to mellow before plants can handle it.
It can carry pathogens. Raw poultry manure can contain bacteria such as Salmonella and E. coli. On ornamental beds that is a hygiene concern, and on vegetables it is a genuine food-safety risk. Hot composting solves both issues at once, taming the nitrogen and using heat to destroy the germs. That is the whole reason we bother with a bin instead of tossing droppings on the garden.
Choosing and sizing your bin
Size matters more than style. A pile needs enough mass to insulate itself and hold heat, and that means a minimum volume.
Make it at least 1 cubic yard, which is 3 feet wide by 3 feet deep by 3 feet tall, about 0.76 cubic meters. Smaller piles struggle to heat up and stay warm. Bigger is fine, as long as you can still turn it.
Use a 2-bin system if you can. The idea is simple and powerful. One bin holds the active, heating batch, while the second holds an older batch that is curing. When the hot bin finishes, you turn it into the curing bin and start fresh. This keeps a steady supply moving and stops you from adding fresh manure to compost that is almost ready.
The bin itself can be many things:
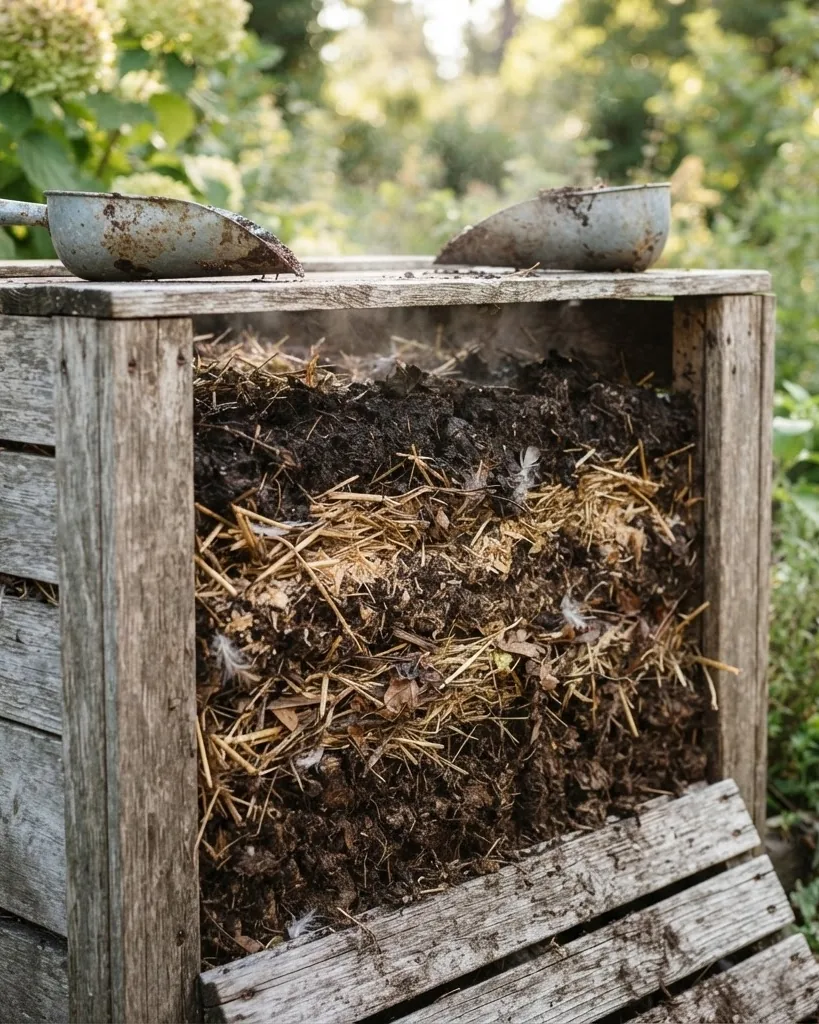
- Pallet bins: cheap, sturdy, and easy to build from four pallets wired together.
- Wire or mesh bins: great airflow, simple to lift off and re-stack.
- Tumblers: tidy and easy to turn, though most hold less than a full cubic yard, so they heat less aggressively.
Whatever you choose, make sure air can reach the pile and that you can cover it loosely to keep heavy rain out while it cures.
The brown-to-green recipe
Compost cooks when it has the right balance of carbon and nitrogen. Microbes need both, and the magic ratio is about 30 parts carbon to 1 part nitrogen.
Here is the part people get wrong. Chicken manure, especially mixed with coop bedding, is very high in nitrogen, which makes it a “green” in compost terms even though it does not look green. To balance it, you add carbon-rich “browns.”
| Greens (high nitrogen) | Browns (high carbon) |
|---|---|
| Chicken manure | Straw |
| Fresh grass clippings | Dry leaves |
| Vegetable scraps | Wood shavings or sawdust |
| Coffee grounds | Shredded cardboard or paper |
A practical rule is to use roughly 2 parts browns to 1 part greens by volume, then adjust. If the pile smells of ammonia, it has too much nitrogen, so add more browns. If it just sits there cold and damp, it may need more greens or more air. One nice bonus of keeping chickens is that the bedding you muck out, full of shavings or straw, is already a brown-and-green mix you can pile straight in.
Building the pile step by step
Assembling the pile well sets up everything that follows. Take a little care here and the rest is easy.
- Start with a coarse base. A layer of small sticks or straw on the bottom lets air rise up into the pile.
- Layer greens and browns. Alternate manure and bedding with carbon materials, roughly 2 parts brown to 1 part green.
- Moisten as you go. The pile should feel like a wrung-out sponge, damp but not dripping. Add water to dry layers.
- Build it all at once if you can. A pile assembled in one go heats faster and more evenly than one added to a handful at a time.
- Cover loosely. A lid or tarp keeps rain from drowning the pile while still letting it breathe.
Once it is built, the microbes go to work, and within a day or two a good pile starts to warm in the center.
The hot phase: hitting 130 to 160 F
This is the stage that makes manure safe, so it is worth doing properly. A long compost thermometer is a cheap tool that takes the guesswork out.
You want the core of the pile to reach 130 to 160 F, which is about 54 to 71 C, and hold there for several days. That heat is what destroys most pathogens and weed seeds. If your pile climbs much above 160 F, turn it to cool it slightly, since extreme heat can kill the helpful microbes too.
Turn the pile to keep it cooking. As the center heats and then begins to cool, turning moves the outer material into the hot middle and adds the oxygen the microbes crave. A common rhythm is to turn every few days during the active phase. Each turn usually triggers another temperature spike. Keep this up until turning no longer makes the pile reheat, which tells you the easy food is used up and the hot phase is done.
Curing: the patience phase
Hot composting is fast, but finishing is slow, and rushing it is the most common mistake I see. After the pile stops reheating, it still needs to cure.
Move the batch to your second bin or simply leave it, cover it loosely, and let it cure for 45 to 60 days. During curing, slower organisms and fungi finish breaking down the tougher bits, and the compost mellows into a stable, sweet-smelling product.
For chicken manure specifically, give it time. A safe target is to age the manure for a total of 3 to 6 months, and many cautious gardeners wait up to a year before using it on anything they will eat. The wait is not wasted. Curing is where harsh compost becomes the gentle, root-friendly material your plants love.
Hot composting vs cold composting
There are two ways to compost manure, and the choice affects how long you wait and how safe the result is. It is worth understanding both.
Hot composting is the active method this guide focuses on. By balancing the ingredients, keeping the pile moist, and turning it for air, you drive the temperature up to 130 to 160 F. That heat is the whole point, because it is what kills pathogens and weed seeds quickly. Hot composting is faster and safer, but it asks more of you, mainly regular turning and monitoring.
Cold composting is the lazy method: pile it up and wait. It takes far less effort, but it never reaches those sterilizing temperatures, so it relies on time alone to break things down and reduce pathogens. With chicken manure, cold composting means waiting much longer, often a year or more, before the material is safe for edible crops, and weed seeds may survive. For manure, I strongly prefer the hot method. The extra work pays off in a safer product you can use the same season.
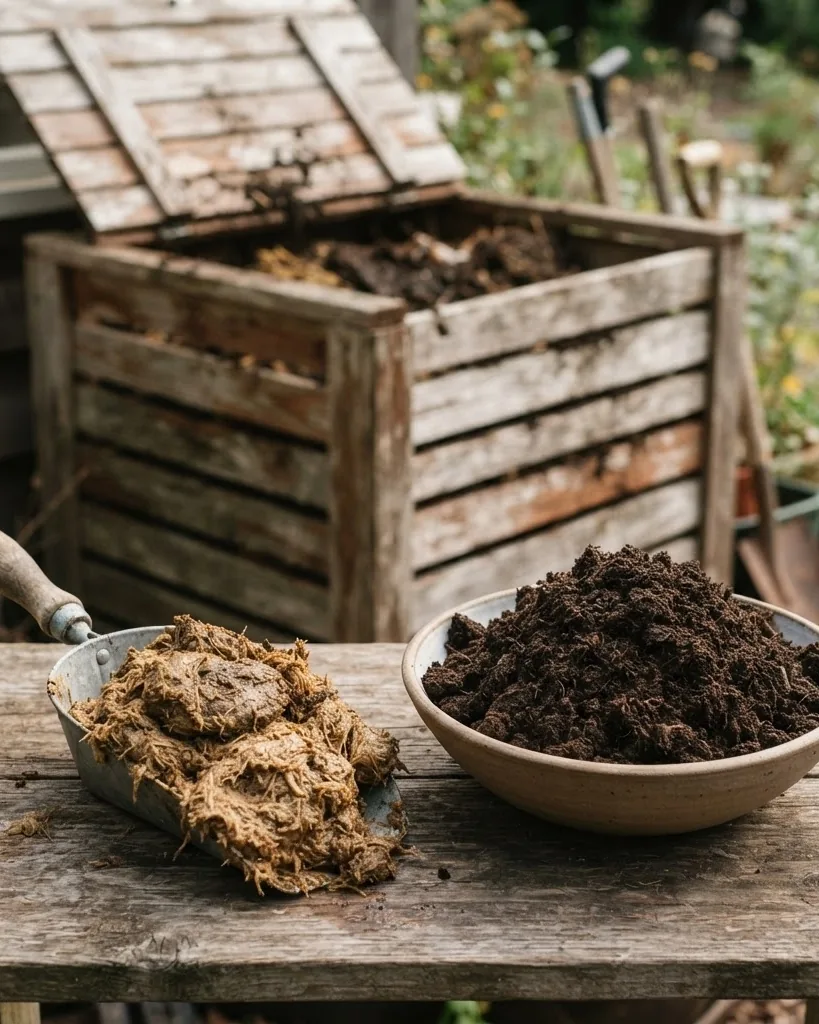
What else can go in the bin
Your manure bin does not have to hold only manure and bedding. In fact, mixing in other compostable material improves the balance and the final product.
Good additions include garden trimmings, fallen leaves, grass clippings, vegetable and fruit scraps from the kitchen, coffee grounds, and shredded plain cardboard or paper. These broaden the range of nutrients and help you hit that carbon-to-nitrogen target. A varied pile tends to make richer, more crumbly compost than manure alone.
Keep a few things out, though. Avoid meat, dairy, oily foods, and pet waste from cats or dogs, which can introduce different pathogens and attract pests. Also skip diseased plants and anything treated with persistent herbicides, since those problems can carry through the compost and into your garden beds. When in doubt, leave it out.
How to tell when it is finished
Finished compost announces itself. Look for these signs before you use it.
- Color: dark brown to nearly black, like rich soil.
- Texture: crumbly and even, with no recognizable manure or bedding left.
- Smell: earthy and pleasant, never sharp or ammonia-like.
- Temperature: cooled to about the temperature of the surrounding air and staying there.
If you still see chunks of bedding or catch a whiff of ammonia, it is not ready. Give it more time, or turn it once more and let it finish.
Using finished compost in the garden
Now for the payoff. Finished chicken-manure compost is a powerhouse, especially for hungry crops.
Feed the heavy feeders. Plants like corn, tomatoes, kale, and broccoli pull a lot of nutrients from the soil and respond beautifully to this compost. Spread a layer over the bed and work it into the top few inches of soil.
Go easier on the light feeders. Root crops like carrots and beets, along with most herbs, do better with a thinner application; too rich a bed pushes leafy top growth at the expense of the part you actually harvest. When in doubt, side-dress lightly and watch how the crop responds before adding more.
Give it a head start. Mix the compost into your soil 2 to 3 weeks before planting. This lets it settle and integrate, and it reduces any chance of overwhelming tender young roots. Your vegetables get a steady, rich feeding rather than a shock. You can pair this rich feeding with a good mulch layer, and our guide on figuring out a cubic yard of mulch helps you plan how much to buy, while the timing tips in when to harvest potatoes show how well-fed beds pay off at harvest.
Safety and hygiene
Because we are dealing with raw manure at the start, a few simple habits keep you safe. Backyard poultry and their droppings are a known source of Salmonella, so treat the process with respect.
- Wear gloves when handling fresh manure and the active pile.
- Wash your hands thoroughly afterward, every time.
- Never spread raw or unfinished manure on crops you will eat.
- Mind harvest timing on edibles. Food-safety guidance generally calls for a long interval between applying raw manure and harvesting, which is exactly why we compost and cure first.
- Keep the bin away from wells and waterways to avoid runoff.
For background, university extension services and the EPA composting at home pages are excellent, the composting guidance from Clemson Cooperative Extension is thorough, and the University of Minnesota Extension covers home methods clearly. They reinforce the same message: heat it, cure it, and handle it cleanly.
Two habits round out the hygiene picture. First, dedicate one pair of boots or shoes to coop and compost duty, and leave them at the door; tracking fresh droppings across a patio or into the house quietly undoes all the careful glove-and-wash discipline at the pile. Second, keep a dedicated fork or shovel for the active bin rather than borrowing the same tool you use in the vegetable beds. Cross-contamination between raw manure and harvest-ready soil is exactly the path you built this whole system to close, and a ten-dollar second fork closes it for good.
Troubleshooting
Most compost problems have simple fixes. Use this quick table.
| Problem | Likely cause | Fix |
|---|---|---|
| Smells of ammonia | Too much nitrogen | Add browns and turn |
| Rotten, sour smell | Too wet, not enough air | Add browns, turn for oxygen |
| Pile will not heat | Too small, too dry, or low nitrogen | Add greens, water, or build bigger |
| Cooks then stalls | Needs turning or moisture | Turn and check dampness |
| Attracts pests | Exposed food scraps | Bury scraps in the center, cover |
FAQ
How long does chicken manure take to compost?
The hot phase takes a few weeks of heating and turning, but full safety comes with curing. Plan on aging the manure 3 to 6 months in total, and up to a year if you will use it on food crops. Patience is what makes it safe.
Can I compost the coop bedding with the manure?
Yes, and you should. Bedding like straw or wood shavings adds the carbon that balances the nitrogen-rich manure. Mucking the whole coop straight into the bin gives you a ready-made mix of greens and browns.
What size compost bin do I need for chicken manure?
At least 1 cubic yard, which is 3 by 3 by 3 feet. That is the minimum mass needed to heat up and hold temperature. A 2-bin setup of that size lets one batch cure while another heats.
Is composted chicken manure safe for vegetables?
Yes, once it has been hot composted to 130 to 160 F and fully cured. Mix the finished compost into the soil 2 to 3 weeks before planting, and never use raw or half-finished manure on edible crops.
Why does my chicken manure compost smell bad?
A sharp ammonia smell means too much nitrogen, so add carbon-rich browns and turn the pile. A rotten, sour smell usually means it is too wet and short on air, so add browns and turn it to introduce oxygen.
How much composted chicken manure should I use?
Treat it as a rich amendment, not a bulk soil. A layer worked into the top few inches of a bed is plenty for heavy feeders. Too much of even finished compost can oversupply nutrients, so go moderate and watch how your plants respond.
Do I need to turn the compost pile?
For hot composting, yes. Turning adds oxygen and moves cooler outer material into the hot center, which keeps the pile cooking and reheating. A common rhythm is to turn every few days during the active phase, then less often as it cools and cures. If you never turn it, you are effectively cold composting, which works but takes far longer.
Can I add chicken manure straight to my garden in fall?
Some gardeners spread aged manure on empty beds in fall so it can mellow over winter before spring planting. It is safer than using fresh manure in season, but composting first is still the most reliable approach, especially for beds that will grow vegetables you eat raw.
The bottom line
A compost bin for chicken manure is the bridge between a messy coop and a thriving garden. Raw droppings are too hot and too risky to use, but a well-built bin fixes both problems. Build at least a 1 cubic yard bin, ideally two, balance the nitrogen-rich manure with about twice as much carbon, and heat the pile to 130 to 160 F to make it safe. Then cure it for 45 to 60 days, aging the whole batch 3 to 6 months before it feeds your vegetables. Stick to that rhythm, handle it cleanly, and you will turn a weekly chore into the richest free fertilizer your garden has ever known. Your soil gets better every season, your plants grow stronger, and nothing from the coop goes to waste. That is a win for your garden and your wallet alike.