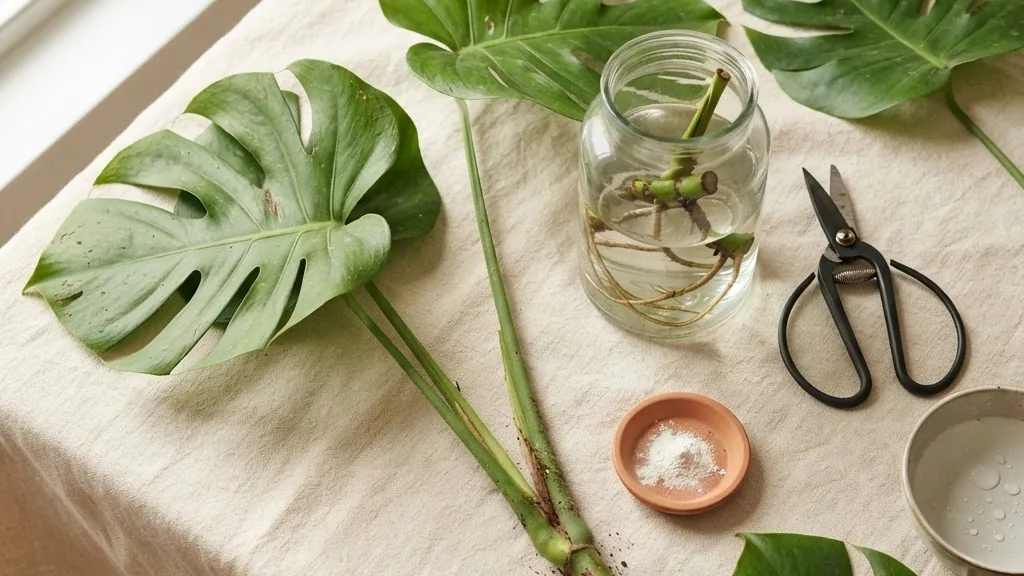
Here is the honest, no-fuss version of how to propagate a monstera: find a node, cut 1 to 2 cm below it with a clean blade, keep at least one leaf and ideally one aerial root, then root that piece in water, moss, soil or by air layering. In water you should see fresh roots in about 3 to 6 weeks. Everything else is detail. I have rooted dozens of Monstera deliciosa cuttings on my kitchen windowsill, and the plants that failed almost always failed for the same single reason. So let us start there.
The Node Decides Everything (1 Rule You Cannot Skip)
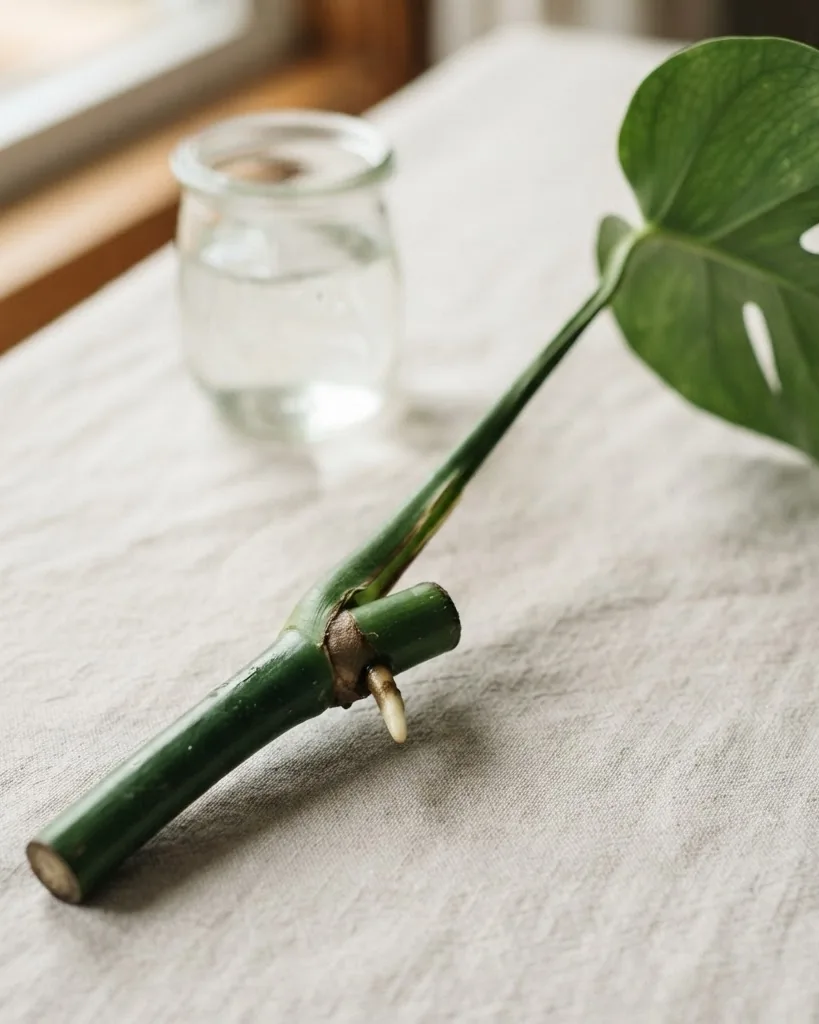
A monstera cutting can only grow into a new plant if it carries a node. The node is the slightly swollen bump on the stem where a leaf, a petiole and often an aerial root all meet. Inside it sits the meristem tissue, the living factory that builds new roots and new stems. Cut a leaf on its own, with no node, and it may sit prettily in water for a month before it quietly rots. If you want a fuller primer on stem structure, my guide to the mini monstera breaks down nodes and internodes with photos.
When you take the cutting, slice 1 to 2 cm below the node along the smooth internode. A clean, sharp blade matters more than people admit, because a ragged crush wound invites rot before roots ever appear. Keep one or two leaves attached so the cutting can still photosynthesise and feed itself. If a stubby aerial root pokes out near the node, leave it on. That root will not become the whole system, but it gives water and moss a head start.
Thickness helps too. Stems at least as thick as a pencil tend to root faster and push new growth sooner than thin, whippy pieces. The Royal Horticultural Society, or RHS, is blunt on this point: without a node, there is simply nothing for the plant to grow from. Remember that and you have already avoided the mistake that sinks most first attempts.
Water Propagation, Step by Step
Water is the method I recommend to anyone rooting their first cutting, because you can watch progress and catch trouble early. Fill a clear jar with room-temperature filtered or tap water that has sat out overnight. Lower the cutting in so the node and any aerial root sit under the surface, while every leaf stays dry above it. Soaking the leaves or the whole petiole is a classic way to trigger mush and rot.
Change the water every 3 to 5 days. This keeps oxygen levels up and stops bacteria and fungi from building a slimy film on the stem. Set the jar somewhere with bright, indirect light, never in a hot window that turns the glass into a little oven. Warmth of roughly 20 C to 27 C speeds things along, so a kitchen shelf usually beats a cold hallway.
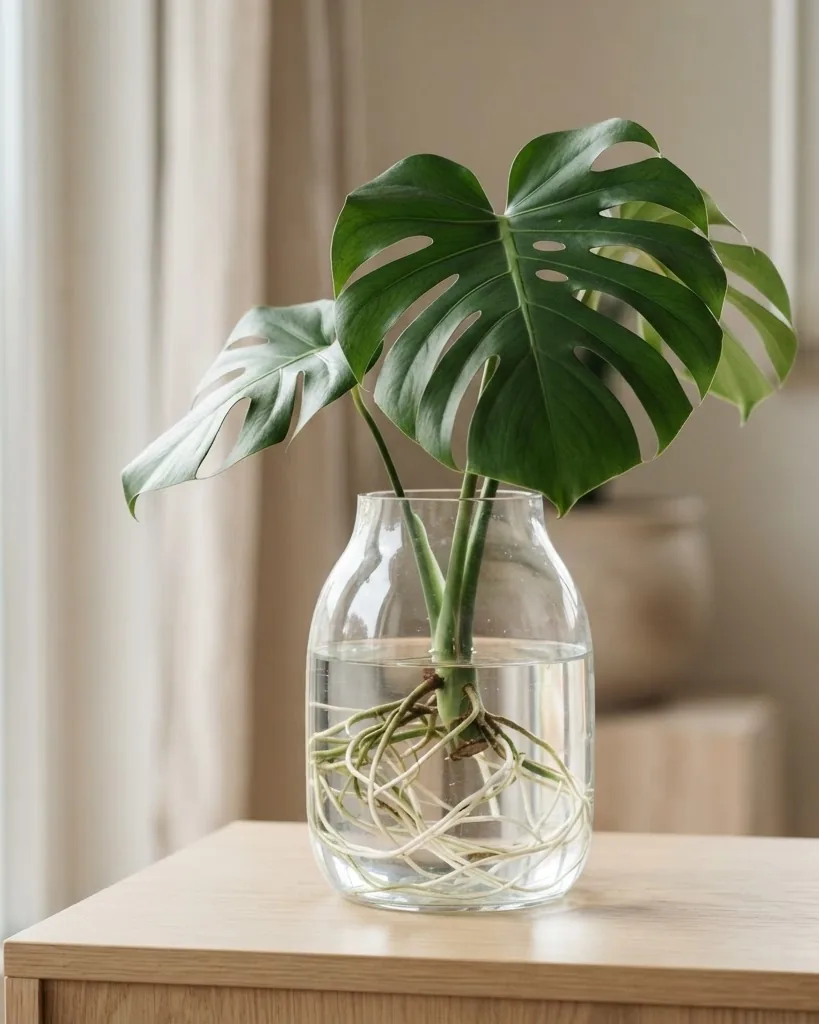
Roots normally appear in about 3 to 6 weeks, though a lively cutting in summer can show white tips within 2 weeks. Be patient in winter, when growth slows to a crawl. Once the new roots reach 5 to 8 cm, it is time to pot up. Wait much longer and those soft water roots struggle to switch over to soil, because water roots and soil roots are built a little differently.
Sphagnum Moss and Soil Methods
Sphagnum moss sits somewhere between water and soil, and it has a well-earned fan club among people rooting rare or variegated plants. Hydrate a handful of moss, then squeeze it until it is damp but not dripping. Nestle the node into the moss inside a small pot or clear tub, keep it lightly moist, and give it warmth and bright indirect light. Roots usually knit through the moss in about 4 to 8 weeks, and the failure rate is pleasingly low because the medium stays airy.
Rooting straight into soil skips the transplant step entirely. Use a chunky, free-draining mix, or plain perlite, and bury the node about 2 cm deep with a leaf above the surface. Here is the counter-intuitive part: wait roughly 7 days before the first watering, then keep the mix barely moist rather than soggy. Soil cuttings root out of sight over about 3 to 8 weeks, so resist the urge to tug the stem and check. A gentle, springy resistance means roots have taken hold.
Which airy method wins? Soil and moss both build root systems already suited to life in a pot, which means less shock later. Water is easier to monitor but adds one transition. I often hedge my bets and start two cuttings, one in water and one in moss, from the same trimmed stem.
Air Layering for a Bigger, Safer Cutting
Air layering roots the stem while it is still attached to the mother plant, so the new section never has to survive alone with no roots. It is the most reliable method and the one I reach for when a cutting really matters. Pick a healthy node, ideally one already pushing an aerial root, then make a shallow upward cut about one third of the way through the stem just below that node. Do not slice all the way through.
Wrap a fist-sized ball of moist sphagnum moss around the wounded node, then cover it snugly with plastic wrap or a clear bag. Secure both ends, but leave the top a touch loose so you can dribble in water and keep the moss damp. Mist it every few days. Because the mother plant keeps feeding the site, roots form with almost no risk of the cutting collapsing.
After roughly 1 to 2 months, when you can see healthy roots several cm long through the plastic, cut the stem cleanly below the new root ball and pot it up. You now have an established plant rather than a bare stick hoping for the best. The Old Farmer’s Almanac describes monstera as a steady tropical that rewards patience, and air layering is patience turned into a technique.
Best Conditions for Fast, Healthy Roots
Rooting speed is not luck; it tracks the conditions you provide. Bright, indirect light is the sweet spot. Monstera evolved under a rainforest canopy, so it wants plenty of light without the harsh direct sun that scorches leaves and cooks a jar of water. An east-facing window, or a spot a metre back from a bright south window, works well.
Warmth and moisture matter just as much. Aim for 20 C to 27 C and humidity around 60 %. If your home runs dry, group plants together, sit the pot on a pebble tray, or run a small humidifier nearby. Spring and summer are prime propagation season, because active growth and natural warmth do half the work for you. In a cold, dim December, expect everything to take longer.
Want to grow monstera outdoors year round rather than as a houseplant? That only works in USDA hardiness zones 10 to 12, where frost is not a threat. Everywhere colder, it lives happily indoors and heads outside only for a warm summer holiday. For clear regional guidance on light, feeding and seasonal timing, the practical care pages at the Almanac are a solid, no-nonsense reference.
Method Comparison: Time to Root and Difficulty
Every method here works. The right one depends on how much you want to watch, how forgiving you need it to be, and whether the cutting is precious. This table sums up the trade-offs at a glance so you can pick with confidence.
| Method | Time to root | Difficulty |
|---|---|---|
| Water | 3 to 6 weeks | Easy, great for beginners |
| Sphagnum moss | 4 to 8 weeks | Medium, low rot risk |
| Soil or perlite | 3 to 8 weeks | Medium, no transplant step |
| Air layering | 4 to 8 weeks | Advanced, most reliable |
Notice how similar the timings are. Method choice is less about raw speed and more about how much handling the cutting can tolerate. If this is your first go, start in water. If the plant is rare, air layer it and sleep easy.
Turning One Monstera Into Many
Once you trust the basics, a single leggy plant becomes a whole shelf of them. Lay a long, multi-node vine on the bench and count the nodes; each one with a leaf and a dormant bud can become an individual plant. Cut between nodes so every piece keeps its own node and at least one leaf, and you have turned one tired vine into three or four fresh starts in a single afternoon.
You can mix methods across those pieces to hedge your odds. Root the strongest node in water where you can watch it, tuck a second into moss, and pot a third straight into soil. Comparing them side by side is the fastest way to learn which approach suits your home, your light and your patience. In my kitchen the moss cuttings usually build the sturdiest roots, while the water jar is the one visitors always want to peer into.
Chunkier aerial roots deserve a word here too. On the mother plant they help the vine climb and drink humidity, so do not hack them all off for tidiness. When you take a cutting, an aerial root near the node gives the new plant a running start, though the real growth still comes from the node. Guide the remaining aerial roots toward a moss pole or gently into the pot, and the plant repays you with bigger, more fenestrated leaves over time.
Pothos vs Monstera: Do Not Mix Them Up
New growers often confuse a monstera with a pothos, and the confusion can waste weeks. Both are climbing tropicals with glossy green leaves, but they root and mature very differently. The quickest tell is fenestration, the fancy word for the splits and holes in a leaf. A mature monstera develops those famous windows once it has age and enough light; a true pothos never does, no matter how old it gets.
Look at the stems and new leaves too. Monstera stems are chunky, rigid climbers that push thick aerial roots; pothos stems are slender trailers built to drape over a shelf. On a monstera, each new leaf unfurls from a papery sheath called a cataphyll, which pothos lacks entirely. If you enjoy telling near-identical plants apart, my write-up on the Monstera Burle Marx Flame shows just how varied this genus gets. Get the identification right and every propagation step above makes sense; get it wrong and you will be waiting on splits that never come.
Tools and Timing: Prepare Before You Cut
Good propagation starts before the blade touches the plant. Gather a sharp knife or a pair of snips, rubbing alcohol or boiling water to sterilise them, a clear jar or a small pot, and your chosen medium. A clean cut heals faster and rots less, so wipe the blade before every cutting rather than reusing a grubby one across several stems. I keep a small dish of alcohol beside me and dip the blade between cuts, which takes seconds and saves plants.
Timing matters as much as tools. The best window is spring and early summer, when longer days and warmth push the plant into active growth. A cutting taken in May roots noticeably faster than the same cutting taken in a dim, cold January, when the parent plant is barely ticking over. If you must propagate in winter, add gentle warmth from a seedling heat mat and give the cutting the brightest indirect spot you have, because low light and cold are the two things that stall roots most.
Choose the parent stem with a little foresight. A vine with several nodes lets you take a multi-node cutting, and each node can become its own plant later. Look for firm, green stems rather than woody old growth or soft, yellowing sections. A healthy mother plant recovers quickly and often pushes a fresh shoot from just below where you cut, so you lose nothing by harvesting sensibly.
Aftercare: Settling a Rooted Cutting Into Its Pot
Getting roots is only half the job; the transition into soil is where careless growers lose plants. When water roots reach 5 to 8 cm, choose a pot only slightly larger than the root ball, because a cavern of wet soil around a small cutting stays soggy and invites rot. Use a chunky aroid mix, or make your own with potting soil, orchid bark and perlite so water drains freely and air reaches the roots.
Plant the cutting so the node and roots are buried but the leaf base sits above the surface. Water it in once, then let the top few cm of mix dry before watering again. Fresh transplants sulk for a week or two while roots adjust from water to soil, and a few older leaves may yellow. That is normal handover shock, not failure, so resist the urge to drown it in kindness. Hold off on fertiliser for about 4 weeks, then feed lightly during the growing season.
Keep the newly potted plant in bright, indirect light and steady warmth of 20 C to 27 C while it settles. Humidity around 60 % smooths the switch, so a pebble tray or a nearby humidifier earns its keep now. Within a month or two you should see a new leaf unfurl, the clearest sign the cutting has truly taken and moved from surviving to growing.
Troubleshooting: Yellowing, Mush and Stalled Roots
Even careful cuttings hit snags, and reading the signs early usually saves them. A stem that turns soft, brown and slimy at the base has rot, almost always from stale water, a buried leaf, or too little oxygen. Trim back to firm, healthy tissue with a sterile blade, refresh the water, and start the clock again. One rescued node beats a whole mushy jar left to spread.
Yellow leaves on a cutting are common and rarely fatal. The piece is spending stored energy while it builds roots, so an older leaf may fade even as the node stays healthy. If the node is firm and pale roots are forming, carry on. A cutting that simply sits for 6 to 8 weeks with no roots is usually too cold, too dark, or too thin. Move it somewhere warmer and brighter, and check that a genuine node is submerged rather than a bare internode.
Cloudy, smelly water is a warning, not a disaster. It means bacteria are multiplying, so tip it out, rinse the cutting, and shorten your change interval to every 3 days for a while. If roots look brown and slimy rather than white and firm, cut the rot away and let the node try again. Patience and clean water fix the large majority of propagation problems without any special products.
Common Mistakes That Stall Your Cutting
Most failed cuttings trace back to a short list of avoidable errors. The biggest, again, is taking a cutting with no node. A node-free leaf can even grow a stray root and look promising, yet it holds no meristem, so it will never produce a new stem or leaf. Always confirm a node before you cut anything.
- Cutting with no node: it may root a little, but it can never grow, and it usually rots.
- Soaking leaves or the full petiole in water: submerge only the node and aerial root.
- Skipping water changes: stale water past 5 days breeds the bacteria that rot stems.
- Direct sun on the jar: it overheats the water and stresses the cutting.
- Overwatering fresh soil cuttings: wait about 7 days, then keep the mix barely moist.
- Potting up too late: move water roots to soil once they reach 5 to 8 cm.
Work through that list and your success rate climbs sharply. In my kitchen, the single change that helped most was simply being disciplined about swapping the water on schedule. Boring, yes, but roots love it.
Is Monstera Safe Around Pets?
This is the part every animal owner needs before bringing cuttings home. Monstera is toxic to cats and dogs. Every part of the plant, including the leaves, stems and roots, carries insoluble calcium oxalate crystals, tiny needle-like structures that irritate on contact. A curious pet that chews a leaf can suffer intense mouth and tongue burning, heavy drooling, vomiting and trouble swallowing.
The good news is that it is usually rated only mildly toxic, so a nibble tends to cause misery rather than lasting organ harm. Still, keep jars, cuttings and potted plants out of reach, and rinse fallen leaves off the floor. The RHS also flags monstera as harmful if eaten, and you can read its full houseplant safety guidance at the RHS website. If you suspect your pet has chewed a piece, call your vet, or in the United States the ASPCA poison line, straight away rather than waiting for symptoms to pass.
Growing On: From Rooted Cutting to Full Plant
A rooted cutting is a young plant with a lot of catching up to do, and the first year sets its future shape. Give it a moss pole early, because monstera is a climber and a supported plant grows larger, more fenestrated leaves than one left to sprawl. Tie new growth loosely to the pole and let the aerial roots find it. Steady light and consistent watering beat sporadic bursts of attention every time.
Feed lightly through spring and summer with a balanced houseplant fertiliser, roughly every 4 weeks, then ease off in the darker months when growth slows. Wipe the leaves now and then so they can breathe and gather light, and turn the pot a quarter every couple of weeks to keep growth even. Repot only when roots crowd the drainage holes, usually every 1 to 2 years, stepping up just one pot size so the mix never sits wet and airless around a small root ball.
Above all, measure progress in leaves, not days. A propagated monstera might spend weeks building roots before it risks a single new leaf, and that quiet stretch is the plant investing below the surface. Once it settles, growth speeds up and each new leaf tends to be bigger and more split than the last. That slow, steady payoff is exactly what makes propagating this plant so satisfying.
Frequently Asked Questions
How long does it take to propagate a monstera in water?
Most water cuttings show new white roots in about 3 to 6 weeks, and a vigorous summer cutting can push root tips within 2 weeks. Keep the node submerged, change the water every 3 to 5 days, and give it bright indirect light at 20 C to 27 C. Pot the cutting up once the roots reach 5 to 8 cm, before those soft water roots grow too long to adapt to soil comfortably.
Can you propagate a monstera without a node?
No. A cutting with no node cannot grow a new stem or leaf, because the node holds the meristem tissue that generates fresh growth. A lone leaf may sprout a token root and look hopeful for a while, but it will stall and eventually rot. Before you make any cut, find the small bump on the stem where a leaf and aerial root emerge, and slice 1 to 2 cm below it so the node stays on your cutting.
Which monstera propagation method is best for beginners?
Start with water. It lets you watch roots form, spot rot early, and learn what a healthy cutting looks like, all with minimal gear. Once you are comfortable, sphagnum moss and soil build sturdier pot-ready roots, and air layering gives the highest success rate for a plant you cannot afford to lose. There is no single winner; each method roots a monstera reliably when you respect the node and the conditions.
Does an aerial root guarantee the cutting will root?
Not on its own, but it helps. An aerial root on the node gives water or moss an immediate foothold and can thicken into part of the underground system. Even so, most new feeding roots emerge fresh from the node itself. So include an aerial root when you can, yet always make sure a true node comes with it, since that node, not the aerial root, is what actually drives new growth.