Quick Guide to Propagating Plants
TL;DR: Propagating plants means creating new plants from existing ones. It’s a cost-effective way to expand your garden. Common methods include taking cuttings from stems or leaves, dividing established root systems, or sowing seeds. For cuttings, use clean tools and sterile potting mix. For division, carefully separate plant clumps in spring or fall. Sowing seeds requires attention to moisture and light. Always research your specific plant’s needs. Some plants, like succulents, are incredibly easy to start from a single leaf. Others, like fruit trees, might need more advanced techniques such as grafting, which is best left to experts. Understanding your plant’s life cycle helps determine the best propagation method.
Want to fill your garden with more plants without spending a fortune? Learning about propagating plants is the answer. It’s a rewarding way to clone your favorite flowers and shrubs. I’ve definitely killed my fair share of seedlings, so I know how daunting it can seem. This guide breaks down the basics for backyard gardeners. We’ll cover simple techniques using resources from trusted sources like university extensions (vegetable garden).
We’re not diving into advanced horticulture here. This is about practical methods for home gardeners to increase their plant collection. Think of it as getting free plants from the ones you already love. We’ll explain the ‘why’ and the ‘how,’ plus what to watch out for. Get ready to multiply your greenery!
Why Propagating Plants Matters for Your Garden
As a backyard gardener, propagating plants is a game-changer. It’s incredibly budget-friendly. Imagine getting dozens of new perennials or shrubs from just a few plants you already own. This is especially true for popular or expensive varieties. You can also preserve genetic traits of your favorite plants. If you have a unique rose or a particularly vigorous tomato, propagation ensures you can keep its lineage going. It’s also a fantastic way to share plants with friends and family. Nothing beats gifting a plant you grew yourself!
Beyond the savings, propagating deepens your connection to your garden. You gain a much better understanding of how plants grow and reproduce. This knowledge helps you become a more skilled gardener overall. For example, understanding how apple trees are propagated can inform your pruning decisions later on. The University of Minnesota Extension notes that propagating specific rootstocks is key to a tree’s vigor and disease resistance.
When to Wait and When to Act for Propagating
Knowing when to propagate is just as important as knowing how. Some plants are forgiving, while others need precise timing. Here’s a breakdown for common backyard scenarios.
Worth watching:
- Softwood Cuttings: For many perennials and annuals, take cuttings in late spring or early summer when stems are flexible but not yet woody. Look for new growth that bends easily without snapping.
- Semi-Hardwood Cuttings: These are best taken in mid-summer to early fall. The stems will be firmer than softwood but still somewhat flexible. Think of plants like hydrangeas or some evergreen shrubs.
- Hardwood Cuttings: These are taken from dormant deciduous plants in late fall or winter. The wood should be mature and firm. Many shrubs and trees, like lilac or forsythia, do well with this method.
- Division: For clumping perennials like hostas or daylilies, dividing them in early spring as new growth emerges or in early fall before the ground freezes is ideal. This gives them time to establish before extreme weather.
- Seed Starting: For many vegetables and annual flowers, start seeds indoors 6-8 weeks before your last frost date. Check your specific plant’s needs; some need stratification (a cold period) before sowing.
Worth calling an expert:
- Toxicity Concerns: If you have pets or small children, and are unsure if a plant part is toxic, *do not* handle it without gloves or let pets near cuttings. Consult the ASPCA’s Toxic Plant List immediately.
- Suspected Invasive Species: If you suspect you have an invasive plant that requires specific disposal methods (like burning or bagging), contact your local Cooperative Extension Office for guidance. Improper disposal can spread invasives.
- Large Tree Propagation/Grafting: Propagating fruit trees or large ornamental trees often involves grafting. This requires specialized skills and tools. For advice on grafting or if you’re unsure about propagating valuable trees, consult your local extension office or a certified arborist.
- Pest or Disease Identification: If cuttings or parent plants show signs of severe, unusual pests or diseases, it might be best to consult your local extension office before propagating. They can help identify the issue and recommend safe treatments.
Step-by-Step: Propagating Plants at Home
Ready to get your hands dirty? Here’s a general step-by-step process for propagating plants from cuttings, one of the most common methods. Remember to always sterilize your tools!
- Select a Healthy Parent Plant: Choose a vigorous, disease-free plant. Look for healthy stems that are neither too soft nor too woody. For softwood cuttings, aim for new growth that’s starting to firm up.
- Take the Cutting: Using clean, sharp scissors or a knife, cut a section of stem about 4-6 inches long. Make the cut just below a leaf node (where a leaf attaches to the stem). Remove the lower leaves, leaving only a few at the top.
- Prepare the Cutting Medium: Use a well-draining potting mix. A common blend is equal parts peat moss or coco coir and perlite or coarse sand. You can also buy specific rooting mixes. Ensure the container has drainage holes. University of Illinois Extension suggests this type of mix is crucial for preventing rot.
- Apply Rooting Hormone (Optional but Recommended): Dip the cut end of the stem into rooting hormone powder or gel. This encourages faster root development. Tap off any excess.
- Plant the Cutting: Insert the cut end into your prepared potting medium, deep enough so it’s stable. You can often stick several cuttings in one pot, ensuring they don’t touch each other.
- Provide the Right Environment: Place the pot in a warm location with bright, indirect light. Keep the potting mix consistently moist but not waterlogged. Covering the pot with a plastic bag or a propagator lid can help maintain humidity, which is vital for cuttings to root.
- Check for Roots: Roots typically form within a few weeks to a couple of months, depending on the plant. You can gently tug on the cutting; if there’s resistance, roots have likely formed. Once rooted, you can transplant it into its own pot.
Common Misconceptions About Propagating Plants
Myth: You need special equipment to propagate plants.
Reality: While a heated propagator or rooting hormone can help, you don’t absolutely need them. Many plants root easily in a simple pot with a well-draining mix. Covering the pot with a clear plastic bag or even a recycled clear container can create a humid microclimate. Clean scissors or a sharp knife are usually sufficient tools.
Myth: All plants can be propagated the same way.
Reality: Different plants have different needs. Some root easily from stem cuttings (like geraniums), others from leaf cuttings (like succulents), and some are best propagated by division (like hostas). Researching the specific plant you want to propagate is key. The Penn State Extension offers detailed guides for various types, including challenging nut trees, showing the diversity in methods.
Myth: You can propagate any part of any plant.
Reality: Successful propagation relies on specific plant tissues and conditions. While leaf cuttings work for some, a leaf might not root for others. Similarly, trying to root a woody branch from a very old shrub using methods for young softwood might fail. Understanding the plant’s growth cycle and preferred propagation method is crucial for success.
Myth: Propagated plants are always weaker than the parent.
Reality: When done correctly, propagated plants should be genetically identical and just as vigorous as the parent. In fact, propagating can sometimes result in stronger plants, especially if you’re using cuttings from a particularly healthy specimen or if you’re propagating for disease resistance. For instance, propagating apple trees using disease-resistant rootstock can lead to healthier, more productive fruit trees, as noted by University of Minnesota Extension.
What to Track When Propagating Plants
Keeping notes helps you learn what works best for your conditions. Here’s a checklist of things to observe and record:
- Date cuttings were taken: Essential for tracking rooting times.
- Type of cutting: Softwood, semi-hardwood, hardwood, leaf.
- Parent plant health: Note any signs of stress, pests, or disease.
- Rooting medium used: Did you use a specific mix?
- Use of rooting hormone: Yes/No, and type if known.
- Environmental conditions: Light levels (bright indirect, partial shade), temperature (approximate).
- Moisture levels: How often did you water? Was the medium consistently damp?
- Rooting time: How long did it take for roots to appear?
- Success rate: How many cuttings rooted out of the total taken?
- Signs of rot or mold: Note any issues that caused cuttings to fail.
Frequently Asked Questions About Propagating Plants
Can I propagate plants from store-bought produce?
Sometimes! For example, you can often root green onions or celery bases in water. Some herbs like basil can be rooted from grocery store bunches. It depends on how the produce was treated and its freshness. It’s a fun experiment, but success isn’t guaranteed for all items.
What’s the difference between propagation and planting a seed?
Planting a seed is sexual reproduction, meaning the new plant is a genetic mix of its parents. Propagation, like taking cuttings or dividing, is asexual reproduction. The new plant is a genetic clone of the parent plant. This means it will have the exact same characteristics, like flower color or fruit type.
How do I know if my cutting has rooted?
The most common sign is new leaf growth appearing at the top of the cutting. You can also gently tug on the cutting; if you feel resistance, it means roots have likely formed. Some clear pots or containers allow you to see the roots directly. If you’re unsure, wait a few more weeks.
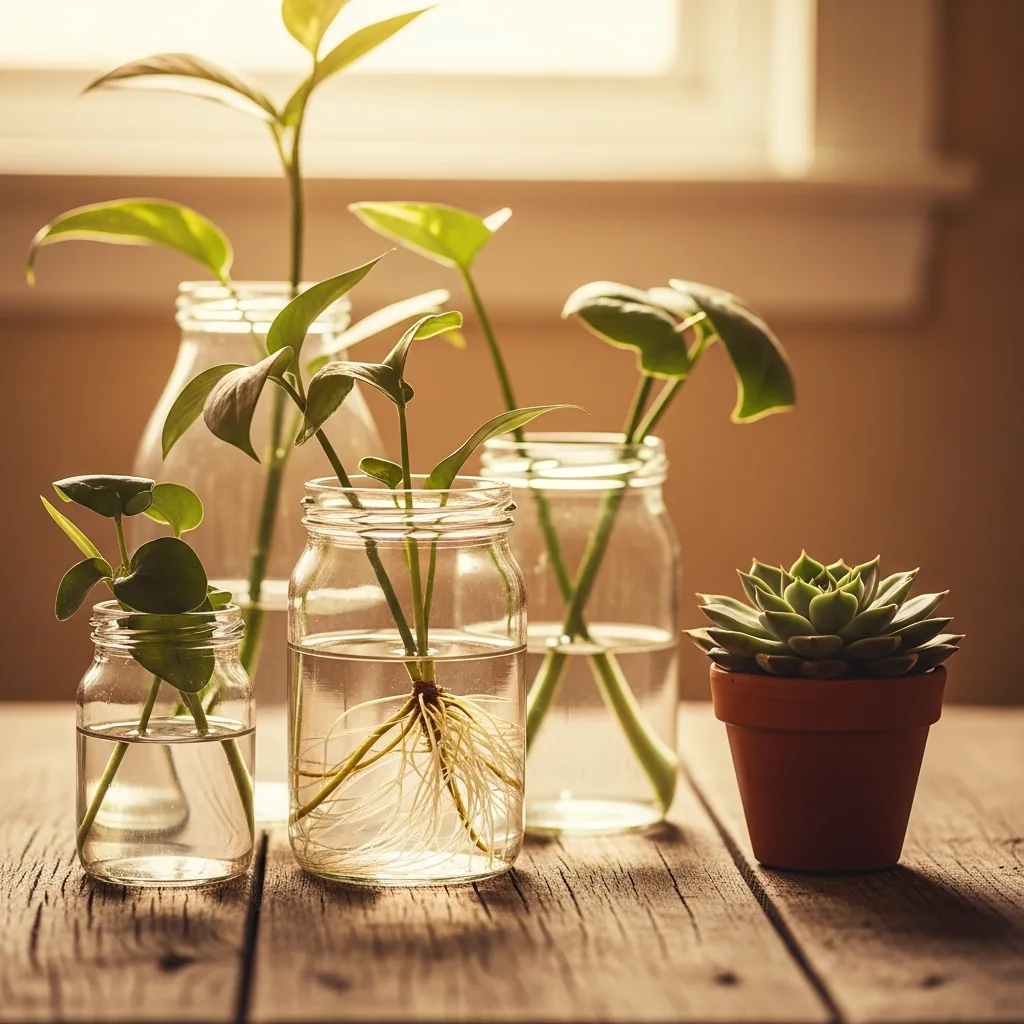
Can I propagate houseplants in water?
Yes, many houseplants root very well in water! Plants like pothos, philodendron, and spider plants are incredibly easy to propagate this way. Just place a stem cutting in a jar of water, ensuring the leaf nodes are submerged. Change the water every few days. Once roots are about an inch long, you can pot them up.
When is the best time to propagate succulents?
The best time to propagate succulents is typically during their active growing season, which is usually spring and summer. This allows them to establish roots more quickly. However, many succulents are quite resilient, and propagation can sometimes be successful even outside this window, though it might take longer. University of Illinois Extension has tips for various types.
What if my cuttings rot instead of rooting?
Rotting usually indicates too much moisture and not enough air circulation, or the use of a medium that retains too much water. Ensure your potting mix is well-draining (like a succulent or cactus mix). Don’t let the cuttings sit in standing water. Sterilizing your tools and pots also helps prevent fungal issues.
Happy Propagating!
Learning to propagate plants opens up a whole new world of gardening possibilities. It takes a little patience and observation, but the rewards are immense. Don’t be discouraged if your first few attempts don’t work out perfectly. I certainly had my share of failures! Keep learning from your plants and trusted resources. If you’re ever unsure about plant toxicity, dealing with significant pests, or need help with large trees, remember to consult your local cooperative extension office or the ASPCA.